SSD1306 connected to Raspberry Pi with Host MCU
This guide describes how to connect a SSD1306 display to a Raspberry Pi and install a Klipper Host MCU to use the Display.
Install Klipper Host MCU
At first, you have to install the service for the Klipper Host MCU. To do this, you have to execute the following commands:
cd ~/klipper/
sudo cp ./scripts/klipper-mcu.service /etc/systemd/system/
sudo systemctl enable klipper-mcu.service
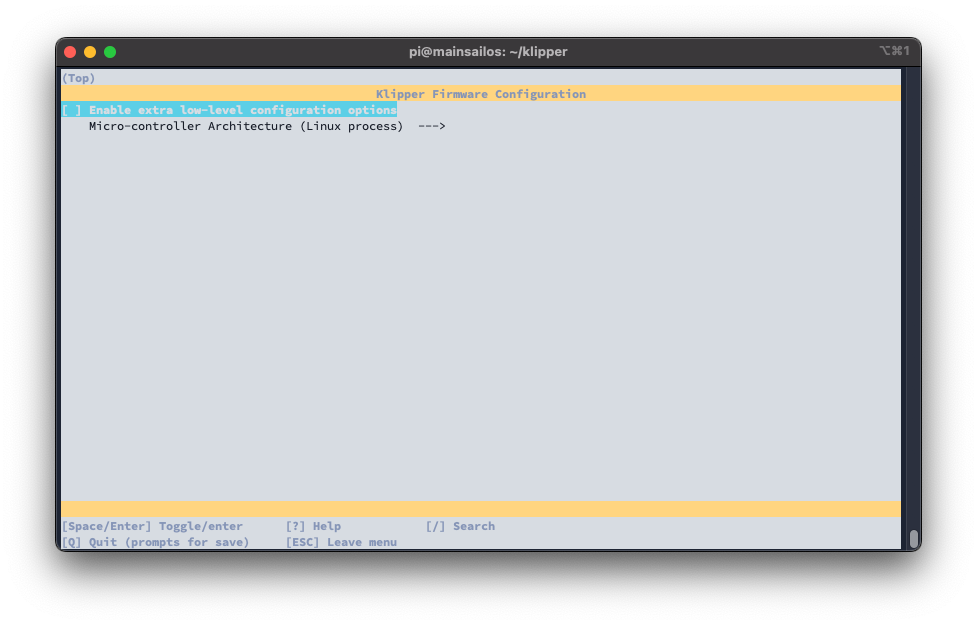
After that, you have to "flash" the Klipper Host MCU to the Raspberry Pi. To open the Klipper Firmware configuration:
In the menu, you have to select the following options:
- Enable extra low-level configuration options: uncheck
- Microcontroller Architecture: Linux process
The result should look like this:
 use
use q for exit and y for save these settings.
Now clear the cache and compile the Klipper firmware:
To flash the Klipper Host MCU to the Raspberry Pi, you have to execute the following commands:
# stop klipper service
sudo systemctl stop klipper

# flash klipper-mcu
make flash

# start klipper-mcu service
sudo systemctl start klipper-mcu

# start klipper service
sudo systemctl start klipper
Now, Klipper Host MCU is installed and running on your Raspberry Pi. To add it to your Klipper configuration, you have
to add the following lines to your printer.cfg:
and restart Klipper.
Permission denied error in klippy.log
If you get the error "Permission denied" in the klippy.log, you have to add your user to the dialout group:
Enable I2C on Raspberry Pi
To enable the I2C interface on the Raspberry Pi, you have to execute the following commands:
To activate the changes, you have to reboot the Raspberry Pi with sudo reboot.
After the reboot, you can check if the I2C interface is enabled with the following command:
This should look like:

Connect SSD1306 to RPi
Connect the SSD1306 display to the Raspberry Pi with the following pins:
- VCC -> 3.3V (Pin 1)
- GND -> GND (Pin 6)
- SCL -> SCL (Pin 5)
- SDA -> SDA (Pin 3)
To check if the connection is working, you have to install the i2cdetect tool with:
and then you can use the following command to test the connection:
This should look like:
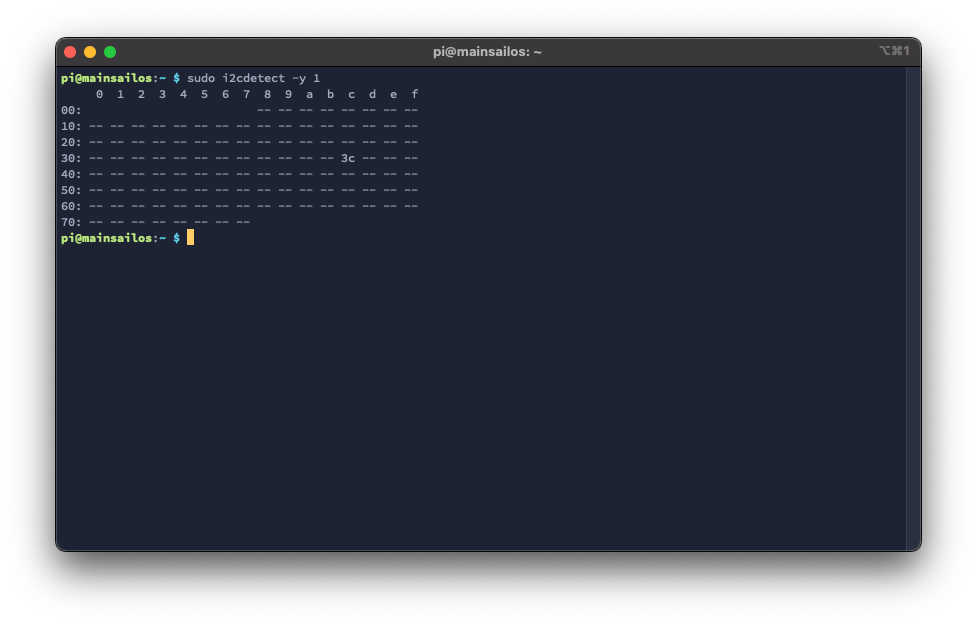 Important is the
 3c in the output. This is the address of the SSD1306 display.
Add SSD1306 to Klipper configuration
To add the SSD1306 display to your Klipper configuration, you have to add the following lines to your printer.cfg:
and restart Klipper.
The result should look like this:
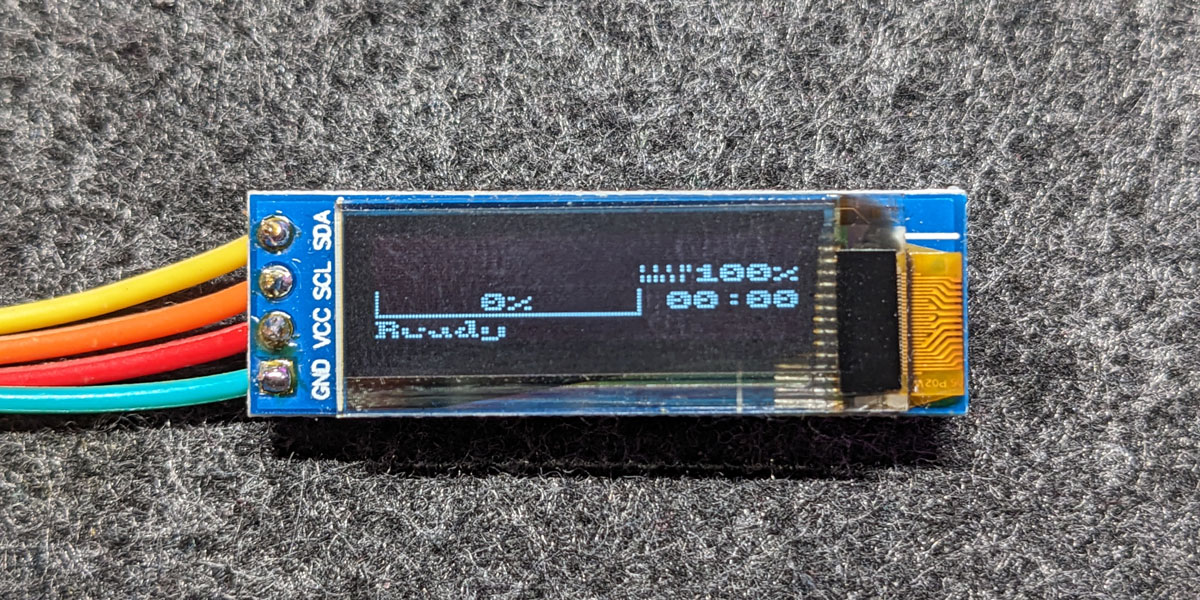
(Yes, this looks not very nice, but it works. If you have a better screen layout for Klipper, please let me know.)